Timo's Oven...Because I can!

So Much Done, So Much More to Go

General — Posted by timo @ 17:09

Well, today was our first really hot humid day in a long while and I just happened to have it fall on the day to pour the foundation for the hearth. As you can see it's all in the preparation. I put enough rebar and angle iron into the structural part to make me happy.

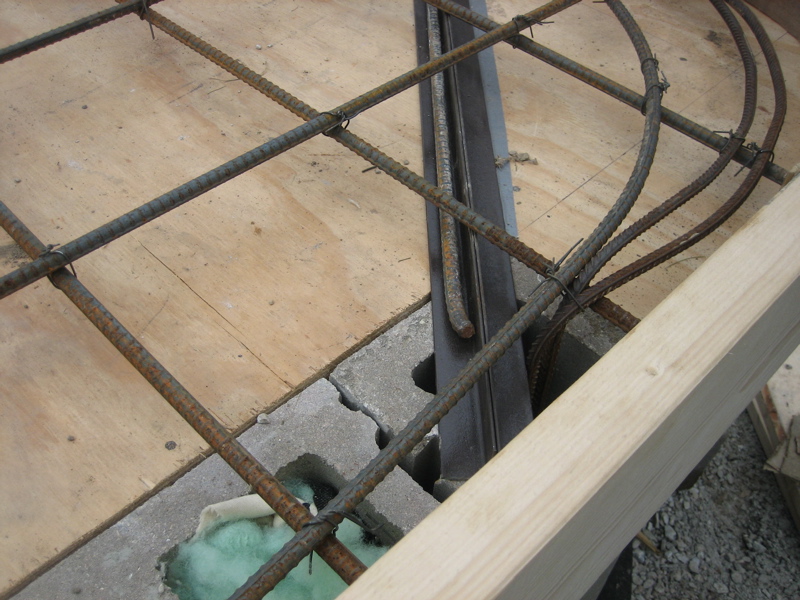
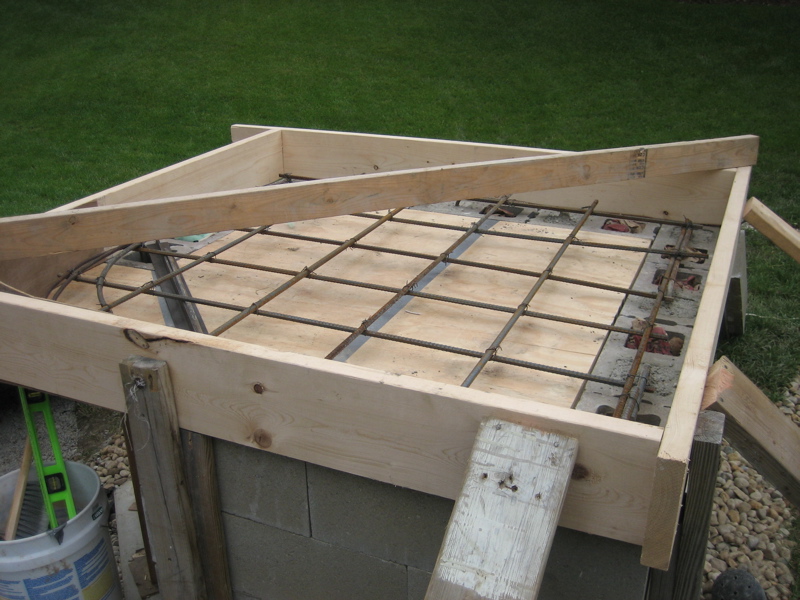
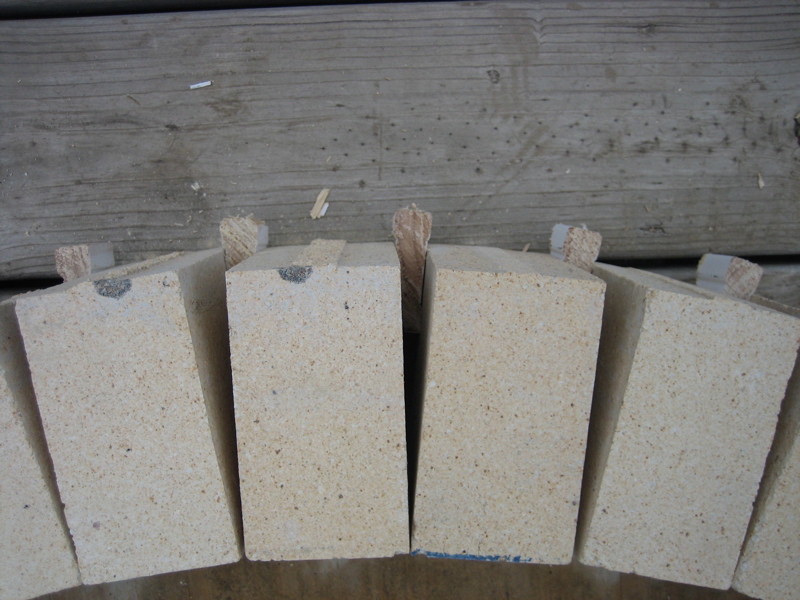
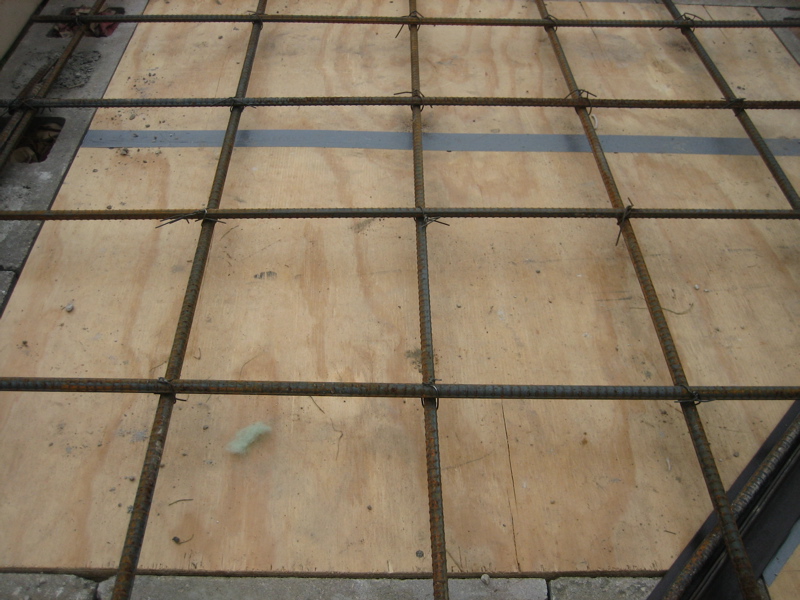
I wanted to provide enough support for the firebrick and the decorative brick arches, too. Hey, it's only concrete, how hard can it be? Well, as you can see the grinding to cut all this rebar was just one step. But what about all the prepp that goes into the plywood form? Well, that took a day in itself. The picture above to the left shows how much rebar I stuck into the front span. I actually poured the front to corners with the hearth pour to hopefully tie in the whole front of the hearth because of the expected weight there and the overhanging landing. The rebar lattice is made of 1/2" rebar at 11" centers. I don't know why 11 inches...it just worked out that way. The plans called for 12" centers.


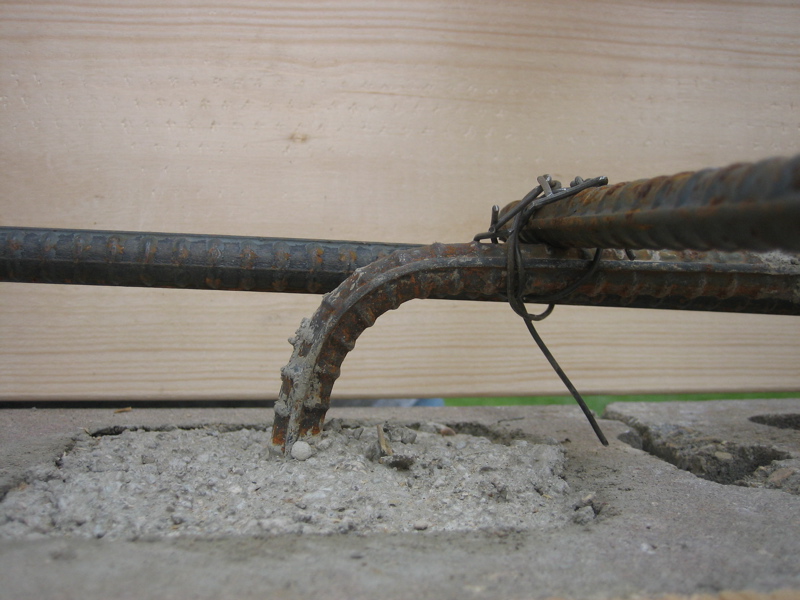
The rebar is bent into a 90 angle stuck into the cores and cemented into place. Yes, this is going to be rock solid. I figure it has to be because I tossed another 1,260 pounds of concrete in there.

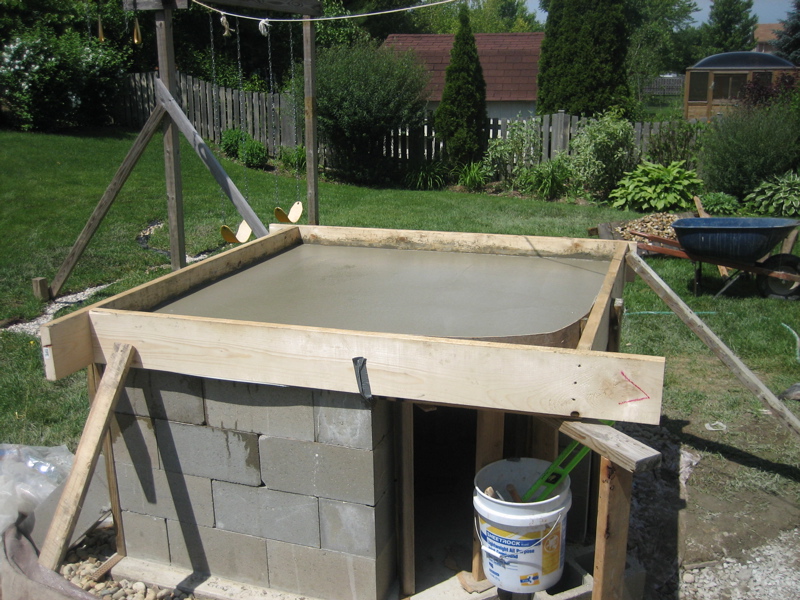
And there you have it. A structural hearth pour. 3 1/2" thick. 21 60# bags of concrete. A bit of troweling for fun after the screeding. I made a nice screeding board out of a 2x6x8 cut out at the ends for moving across the hearth.


 I have to say this is one nice looking pour. It took about 3 hours to mix it all. We, of course, are expecting giant storms sometime later tonight, or tomorrow. That's why once I was done with it all, I covered it twice: Once with plastic to keep it from drying out too fast, and once again with a tarp to keep the rains off of it.


These are my two amigos. Without a decent pair of gloves you are in for a lot of trouble! Get a good pair and make them your best friends.


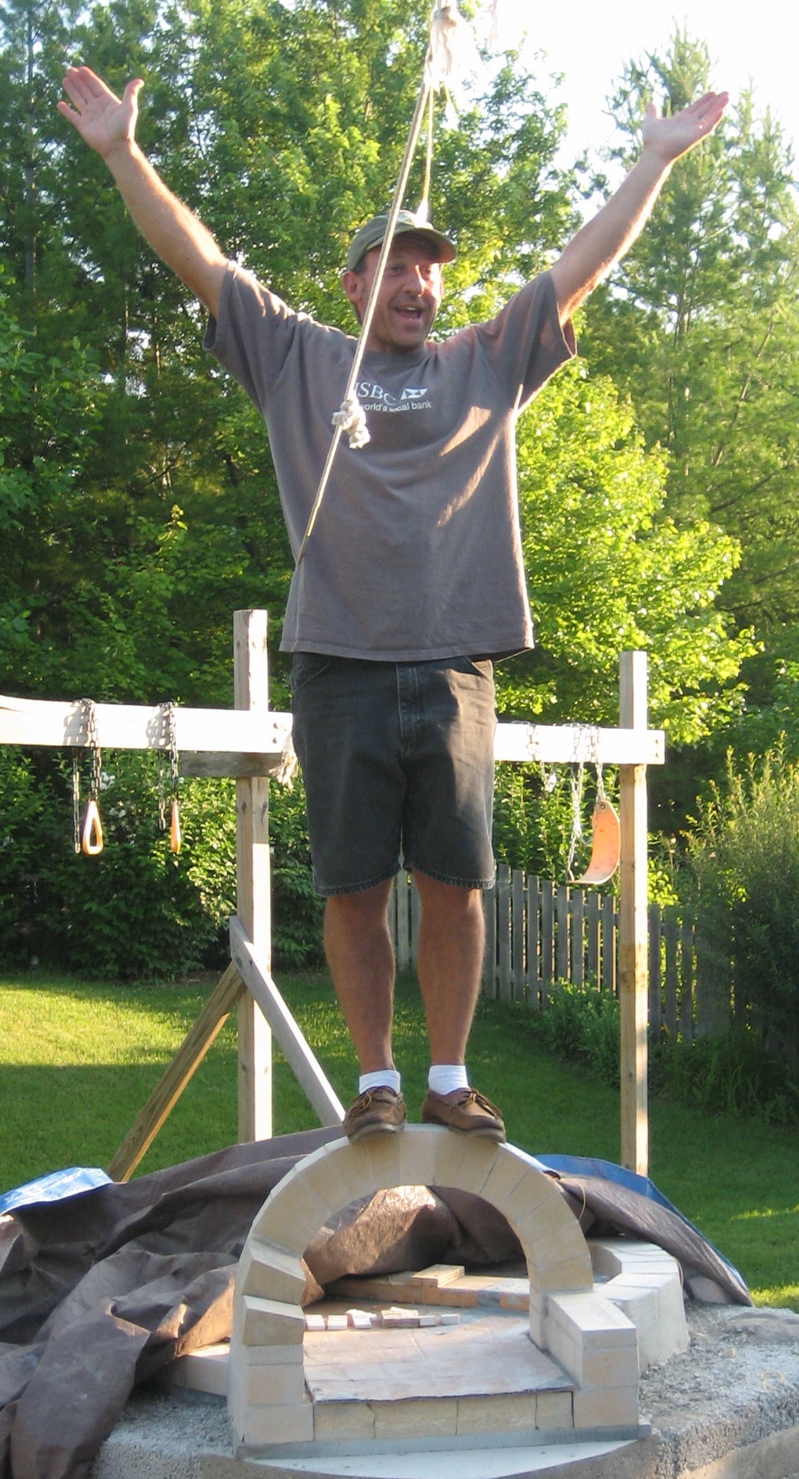
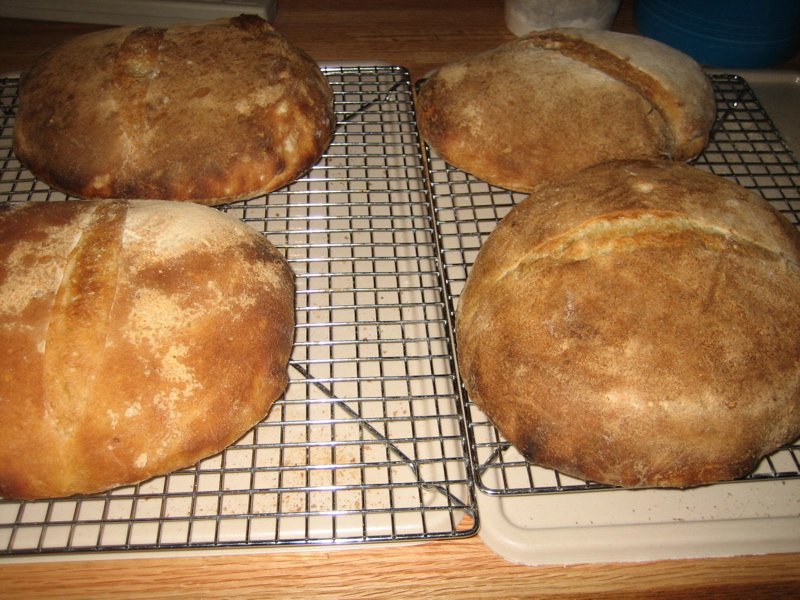
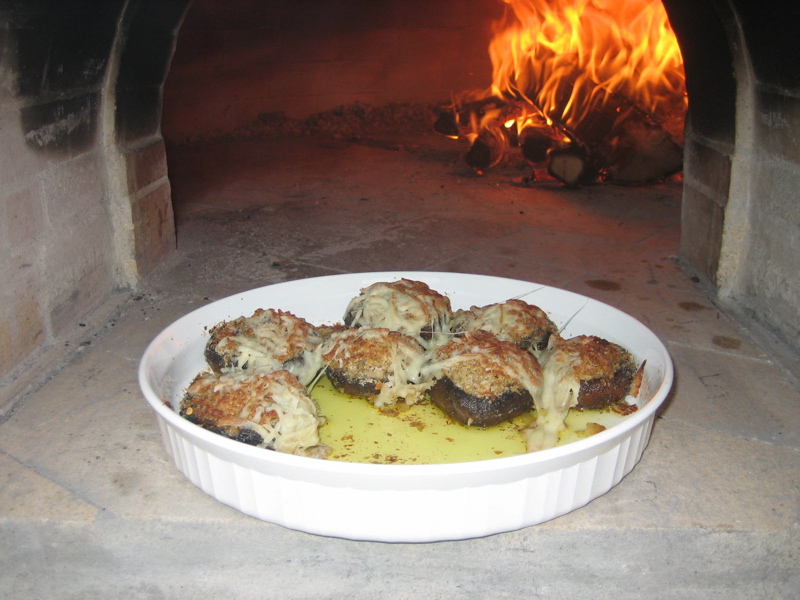
Well, guess what? I went to the library today and picked up 6 Sinatra discs and some other interesting discs. There is something about Sinatra in the background while eating. Maybe it's me. Anyway, Here's a favorite to be soon, around the oven. Enjoy! Now the hard part begins after the perlite insulation layer...actually building the oven. 


Golden Arches

General — Posted by timo @ 16:58

These were my first ideas for the vent arch. As I went over and over the arches the design changed many times. I finally settle on the last one with me on top of it. I have placed the first row, or soldier course down. I have also started on the first real course of the oven. It's slow go, but I have found some really excellent books about real pizza from Naples. We are going to have a pizza party like a once in a lifetime party. Someday soon...


Ouchy Fingers

General — Posted by timo @ 01:26

As you can see from the picture, the spacing has to be just so when placing the half bricks of firebrick. The angle between the bricks determines the final shape of the oven dome. Too much space and it's too low, not enough and it balloons out at the top.


I went back and forth with the spacing for about two weeks until I settled on a piece of wooden trim used for an interior door. It just happen to have little ridges and the perfect spacing depth to make a 39 1/2" arch. As you can see, as I get to the top, the top most blocks will be completely upside down and almost level. That is the final keystone area.

Now before I ever get that far, I have to let my fingers heal. Seems the portland in the mortar wants to make your fingers disintergrate at the pressure points. So now I have tiny, painful holes in my fingers. So, I have learned my lesson and will always wear gloves when working with the mortar. It's just I took so long to finally get the spacing and the first two courses level that when I got to the first angled course, it really started to go quickly. And you know how you get when you get into a "flow".

So, yesterday I cut another35 whole bricks into 70 half bricks. I am now on my fourth wet saw blade. But to be honest, the last blade was a close out from ACE Hardware and was a cheapy for only $11. The latest one is much better and a full 4 1/2". Breaking through the rest of the brick is very easy after cutting through both sides of the brick.

Here's a mock up of the pizza peel and the first arch made with no mortar. It was too small, so I made it 2" wider and 1" higher. Looks like fun, doesn't it? That's a 13" pizza pan. The opening was a bit too small for working a fire and moving pizzas around.

Well, today it's suppose to storm, so I will try to scan some pages from the book, Bread Alone, by Dan Leader. The link takes you to the website for his bakery in New York. Learning how to make real Naples pizza and bake bread is a hobby that will last the rest of my life. And some nice benefits for family and friends, too. :)


6 Months Work in a Month

General — Posted by timo @ 04:14

This picture represents about 6 months of normal night and weekend available work time actually squeezed into one month. The inner arch was done first. Then the dome was built up and then the outer arch and vent opening was completed.

As you can see, the bricks take on the dome shape. The first three courses were the hardest. I had to level and place them just right to make the outer ring just right. As it turned out, after setting the first three rows the dome actually built itself. The laws of math and physics took over and there was really only one way to place the bricks. The hardest part was trying to get the offset from the lower course so there wouldn't be too many seams lining up, but that did happen quite a bit. I hope the overall integrity is such that it makes up for any seams.

This is the outer arch. The last top tapered brick had to be carefully tapped in with a rubber mallet. Luckily it displaced some mortar from the other joints, instead of moving the whole side of the arch. It may not look pleasing to the eye, but nobody will ever noticed it as I take out a steaming pizza. I actually took out the forms about an hour after laying the bricks, and set the flue tile on top of the arches and it was already strong, so I don't have any worries about its strength. Besides a decorative brick fascade goes over it, too. If you look closely you will see a small indentation on the inner arch. That's what they call a reveal. The reveal allows you to snug a door up to the inner arch to seal off the oven for breads, or roasting. But please never cut off a live fire! The door actually goes past the vent opening so you actually cut off the flue. With any luck all of the high tech insulation will keep the oven at 500 degrees for a day or two.

Well, as I mentioned, 6-months-of-work-in-a-month time has just about come to an end. As of July 19th, time is up and the rest will go very slowly. Luckily, if next week I get the dome closed in and the flue tile set, I can wrap the whole thing up in a tarp and leave it for the two weeks of vacation. That's two whole weeks of cure time. I have placed a lot of mortar into all those joints. So far I have used 1 1/2 bags of masonry cement, 1 1/2 bags of fireclay, 3 bags of sand and gallons and gallons of water.

All that water has to be driven out VERY SLOWLY! If it goes out to fast, it turns into steam, which has enough pressure to move mountains, it will explode the bricks and mortar joints. So, if I get the masonry work done by July 19th and let it sit, the curing fires will take place each day for 10 days right after we get back from vacation. In the mneatime I can put a decorative brick arch around the outside and fill the small landing area with brick, too. The rest gets a coating of stucco. But before any of the stucco goes on, I have to insulate the oven dome.


That's it for now. Hope it gets done next week...


Dome Done with Flue

General — Posted by timo @ 04:09

Here is the finished dome with flue. I have another 8x8" flue tile to set on top of this one in case I need more draft to draw the smoke up and out. I went in to clean up the rest of the mortar and that was not easy, but it's done. Now I'll let it sit for about three weeks to let the mortar harden. There are lots of other items left to do, but the biggest ones are now done.

That's all for now :)


First Fire

General — Posted by timo @ 14:48

Watch the video. It's all about my first fire. OK, it was just paper strips, but it's a huge step forward in getting to completion. Today I went over designing the oven door with Dennis and I think Steve at Wilson Steel and Railing will be able to make something. I just hope it doesn't get too expensive, maybe $50-60 and a few loaves of the best bread around.


First_Fire.MOV


Oven Door!

General — Posted by timo @ 15:08

I was able to get the basic layout of the door finished. I still have to drill a few more holes and attach the leaning guide at the bottom, but I think it looks great!

 The middle has 1" SuperIsol in it, so I think it will do a good job of insulating. The outer layers are 14 gauge 304 stainless steel held together with #10-24 stainless steel bolts and nuts. Very fun job!


Decorative Outer Arch

General — Posted by timo @ 02:01

This is what they call the Decorative Outer Arch, or DOA. It's another major milestone of completion. I really didn't think I would get it done before school started.  I was very happy to actually have this part turn out the way I saw it in my head weeks ago.

 That's when Wally, the old man that hung out in the back alleys of the ACME Brick yard, told me about the pink Chicago Commons. I dared skunks and three heart broken kittens to wrangle through three bins of brick chunks to find these. These were salvaged from actual buildings in Chicago.

If you take a closer look, the bricks making up the actual arch are the older commons, but the bricks making up the front apron are just salvaged bricks that are very, very close to the Chicago commons. They are also salvaged. They still have a few spots of old mortar clinging to them.

The yellowish bricks you see under the door are the firebricks from the oven landing. I haven't decided on what brick, or material to bridge from the oven hearth bricks to the front edge of the outer apron. There's about a 10" gap at the apex of the arch. One brick isn't enough, but I may just use firebrick, or maybe a piece of granite, or perhaps maybe even some flattened river rock.

Anyway, the last steps are:

1. Stub up a chimney.

2. Finish apron-to-hearth brick work.

3. Insulate everything.

4. Cure the brick oven!

5. Stucco the small amount of space between the dome and edge of hearth and the concrete block walls. I am thinking of using flattened river rock embedded randomly into the stucco.

6. Make wood storage door.

7. Make wooden bread/pizza peel.

8. Make a metal pizza turning peel.

9. Make ash rake.

10. Make a brass ash broom.

11. Make a swabbing mop.

12. Make/buy a tool hanger.

13. Mount the Dachshund hangers on oven.

14. Buy a digital scale, instant read thermometer, rising tubs, larger measuring cup, and lots of other things.

15. Surprise people with simply wonderful bread and pizza.


First Real Fire

General — Posted by timo @ 18:14

It is the first real fire and the end to many days of uncertain work. The fire burned like magic in the hearth and the smoke filled the oven chamber to just the right proportion. It was neat watching the fire and smoke dance across the hearth and up through the flue and exit the chimney.

The picture shows an old Char Broil propane grill with a longer hose attachment to a 20# tank. I ran the grill for 2 hours to get the oven dome up to 200 degrees.

Then, I was able to toss in embers from the fire pit. This worked out really well.

 I have to go back for a second. The picture on the left shows the high tech ceramic insulation. There's about 4" on the dome top and about 2" on the sides.


Watch this movie to see a 300 degree curing fire. Wow, this has been very rewarding to finally see it come together this far...


Chimney Time

General — Posted by timo @ 12:28

Here's the chimney. It was a challenge. I am not quiting my day job. It's bowed and not exactly level, but it's close and looks pretty nice and has that rustic look to it.

The rocks in the front are sitting on top of an inch of SuperInsol board and some mortar. I will add some more mortar and grout later. Bye for now.


PS. I had my second curing fire and got it up to 370-400 degrees. After camping I'll bring it back up to 450 and soon get it plasmatic.


Barm Starter

General — Posted by timo @ 16:25

I will be using the recipe from the following book, Crust and Crumb by Peter Reinhart. I already malted, dried, and ground the malted organic wheat berries into diastatic malt flour. I think this would make a nice tasting loaf.


Chimney Crown and Cap Completed

General — Posted by timo @ 07:37

Here's the completed chimney crown and cap. The forms for the crown took a while, but I think it turned out nice. It wasn't more than six hours later after taking the forms off and mortaring the surface that it started raining. The drops went to the edge of the crown and dropped off from there, so I guess it does what it was built to do.

The first thing I baked was this wheat sourdough loaf. It isn't a wimpy loaf. Has a lot of character and chew.

I made six more loaves like it the next night. Anyone need a loaf?

Well, soon I'll post some pics of the first attempts at pizza. Bye for now.


First Pizza

General — Posted by timo @ 17:45

Here's a picture of the very first pizza. It was burned a bit on the bottom. I later found out why- too much olive oil in the dough. But, it was still fun and interesting to make pizza in the oven.

I was very happy to have this as my first attempt and not the one that stuck to the floor of the oven. The following week I just went ahead and made the Reinhart dough recipe and made the right dough. It tasted good and needs a nice hot oven to bake just right. I was able to produce a 90 second pizza later in the evening. So, yes, this dough is much better that the last recipe.


Here's a short video of the very first pizza.

Sorry, excuse the jitters :(

first_pizza.mov


And here's a bunch of baguettes. The crust was crunchy and had that slight smoke flavor. The crumb was tight and chewey. With butter it was the best. It really does taste better if you let the bread cool down. More fuller flavor.

 I am getting closer to really having a larger party with lots of pizzas. So far I have a good dough recipe and sauce recipe, but I always run out of sauce. I have to work on the sauce and toppings.

That's about all for now. I think next week is Labor Day and Alex will be home. So, yet another good excuse for a pizza party!


Stucco Coating

General — Posted by timo @ 18:21

Here's a picture showing the stucco. This is just the second layer. I added another layer that turned out nice without any cracks. Then I fired up the oven and still no cracks -meaning no heat escaping into the stucco, so that turned out good.

 I still have to seal the flue and crown joint before it rains, which might be soon. I wasn't planning on rain until Monday, but they lie!

I really like the red brick color and chimney. I do not like putting stucco on, though. I just don't have the patience to make it smoother, or perhaps a clue on how to do that, too.

But anyway, it will be covered with some nice acrylic latex exterior paint hopefully 28 days from today because that's about how long a good cure is needed for concrete. So, I am assuming stucco is the same, but I'll double check that.

I haven't tallied the receipts yet for the total cost of this project, but Jackie has a number in her head because I am sure she has festered about how much I've spent...$1,400 is what she believes is the current cost.

I think it is about $200 less. So, in her calculations, each pizza costs about $120 right now. That's some dang costy pizza. I can take care of that, though.

I just have to make enough pizzas to get the costs down. So, tomorrow is the first real run at a pizza party. I'll take pictures and videos hopefully of all the fun and goings-on. We are expecting 13 people over and I want them to all make their own pizza, but not for themselves, but to share. Sort of like, "Hi, my name is Tim and my pizza has peppers, onion, and Italian sausage with provolone and mozzarella on it" Then you and everyone else has a chance to try your pizza. With 13 people, everyone can get a piece and the best part is the next pizza will be 3 minutes away. That's if they didn't put too many ingredients on it, or forgot to flour their hands and peel well.

Speaking of peels, I bought a store peel from Bed, Bath, and Beyond, using of course their coupon for 20% off one item. That brought the cost down to $8. I can't make one for that much...I don't think. Only problem is the handle is very short, so I might be risking my life getting it into the oven, or at least the hair on my right arm. 

Well, I spent a chunk of today cutting all the vegetables, precooking all the meat, and mixing dough. Dennis and Nancy brought over some of the best flour you can buy: King Arthur Bread flour and all-purpose unbleached. All the best bakers always speak highly of King Arthur. Dennis even got the 00 type pizza flour, so this will be interesting.

I plan on making 12 pizzas, two focaccias, and six loaves, or boules of french type bread. I'd like to try a sciacciata, but don't know if I'll have the time to bring the oven up, make the bread after letting it cool a bit, then bring it back up for pizza.

 I've also had my eye on a crab stuffed mushroom recipe that you can dip pita bread in the garlic infued oil. Of course that means you need a good pita recipe, so...


First Pizza Party

General — Posted by timo @ 18:53

We had our first pizza party. The pizzas turned out very good. Everyone pretty much made their own pizzas. The dough was a bit wet and difficult to manage for most, so I did a lot of that. I don't think dough management is big with this group... Take it easy.

  This is the oven during fire-up stage. The soot and creosote builds up on the walls until the bricks reach about 700 degrees and then they go white and it all burns clean.

The oven is beginning to fire hotter now. I believe it is curing and the use of hard wood creates more heat. The chimney got hotter than ever before,, so too did the brick arches and the flue and, well, everything. It was a bit scary how this oven can behave.

Click the flaming picture to watch the video and see what these flames look like when they are churning away in the dome. For some reason most people mumble something about the flames...It's kinda scary sometimes.

Here's a focaccia with salt and rosemary on it. I sliced it and served it to the shower planning committee. It was gone very quickly. Everyone said it was good, and... I have to agree. It was pretty darn good. Plenty of oil and hot out of the oven. It was just nice to finally have a really good piece of bread come out of the oven.

As far as the other hearth loaves, let's just say I am still dialing in the art of artisan bread.


 So, I'll just keep trying. Usually the bread is better than what I will admit, but still not want I wanted. The dang oven was just too hot. The dough over proofed waiting for it to come down. Usually the temps fall quicker, but because of the heat soaking and curing, the oven just sat at 740 forever. It was amazing to swab the hearth with a soaked cloth and clean and steam it. Then the temp raced back up after the steam faded.

I'll toast them in the morning to see what they tatste like.

Another recipe that actually turned out were the stuffed mushrooms.

I thought I put enough oil in the pan, but the mushrooms soaked it all up,except for a little. I loved the taste of these so much I forgot to place some oil in a dish to dip the focaccia.

Not bad for the first pizza party though. There are no actual pictures of pizzas, though. I was manning the oven and not the camera, so...

Next time I will have to take pictures of the pizzas as they come out. The best ones were the ones that charred a bit. That meant the crust was crunchy and the char actually provides flavor.

That's all for now. I will take a break from the oven for a few weeks after tomorrow. Lot's of work prepping for the party...


«Previous   1 2 3 4  Next»

Powered by LifeType